

TODAY IS THE LAST DAY for our Pumpkin Potholder giveaway!
Leave a comment and I’ll put your name in the hat for the GIVEAWAY.Post on your blog linking back to here and
I’ll put your name in TWICE!
Leave a comment and I’ll put your name in the hat for the GIVEAWAY.Post on your blog linking back to here and
I’ll put your name in TWICE!
I’ll announce the winner TOMORROW morning.
Now read on for some more great ideas using pumpkins!
Oh yeah and there is a tutorial at the end!
~~~~~
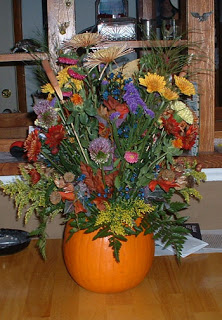 Pumpkins as Vases!MARTHA has dozens of ideas!
Pumpkin Aligator
I LOVE these!
~~~~~
Make Your Own Pumpkin Spice
1/4 cup cinnamon
1 T allspice
1 1/2 tsp. ground ginger
1 1/2 tsp ground nutmeg
1 tsp. ground cloves
Store in airtight container.
Use in muffins, pancakes, bread…
Use in muffins, pancakes, bread…
~~~~~
Here is a GREAT way to make your own pumpkin!
Love it!
Love it!
~~~~~~
Pumpkin Potholder Tutorial
You will need:
small amount of green fabric
small amount of orange, maybe 1/4 of a yard
scraps of batting
(I always save my quilting scraps of fabric and batting)
Orange thread
Sewing machine
scissors
small amount of green fabric
small amount of orange, maybe 1/4 of a yard
scraps of batting
(I always save my quilting scraps of fabric and batting)
Orange thread
Sewing machine
scissors
 Cut a strip of green fabric about 1 1/2 - 2 inches wide and 12 inches or so long.
I was just estimating and using scraps that I already had cut,
it does not need to be exact.
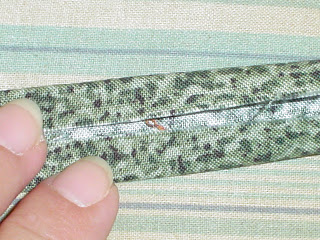
Fold the strip in half and press it;
fold both sides in and press it;
then in half again, press it, like a double bias tape.
fold both sides in and press it;
then in half again, press it, like a double bias tape.
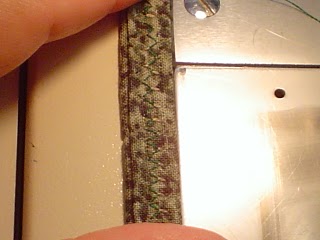 Sew a zig zag all the way down. The purpose is to hide your raw edges.
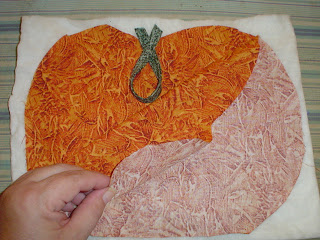 Cut your orange fabric to look like a pumpkin.
I folded my fabric 4 times to get 4 pumpkins pieces,
I cut all 4 at one time.
The fabric was right sides together twice, so that they would be the same shape.
Be sure to make the bottom of the pumpkin flat so that it will be easy to stitch up.Cut 2 layers of batting, place it under the pumpkin.
place wrong sides (non-printed side) of pumpkin together;
put them on top of the batting.
Place your stem as shown; gently lay the top layer of pumpkin down,
making sure it is even with the other pumpkin.
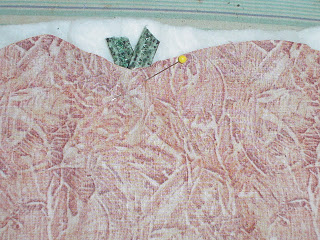 Pin your stem and pumpkin in place.
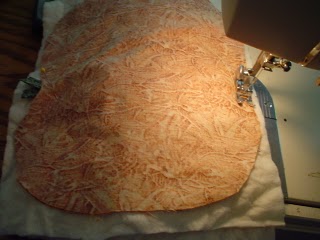 Starting a couple of inches over from the center bottom,
stitch around the pumpkin; remove your pin when you come to it.
Leave a 3-4 inch opening at the bottom.
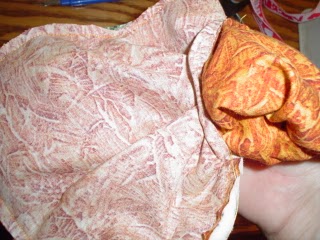 Trim off excess fabric, batting and stem that is sticking out.
Carefully turn pumpkin right side out.
 You may want to trim a little of the batting off at the bottom here.
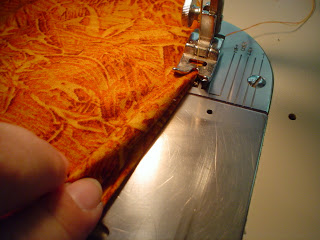 Then fold your opening under, making a small seam, you can press it if it helps.
As closely to the fold as you can, sew the opening closed.
Be sure to backstitch to hold it secure.
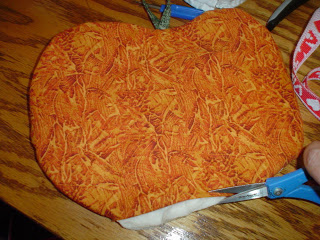
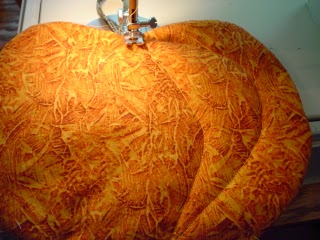 Starting at the top center, sew half circles to make it look like a pumpkin. When you get to the bottom center, while your needle in down in the fabric, lift your presser foot up, turn your pumpkin in the opposite direction, put foot down and sew upward. continue this until you have enough lines sewn.
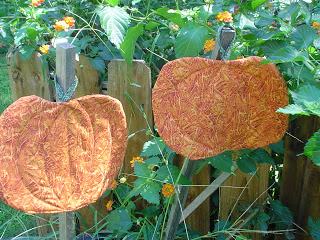 There you have it!
Abbi says:
Your pumpkin potholders are quite cute! It looks like you like to make a lot of things.
I want to invite you to join me at my blog ( http://www.Proverbs31living.blogspot.com ) every Monday until Christmas for “A homemade Christmas”. I am going to have a Mr. Linky set up and I would love to hear as many ideas as possible for homemade gifts, food, decorations and other fun homemade things for Christmas.
Abbi
Christian Louboutin Slingback says:
88888 We are undecided if they are sufficient to prevent a pedicab driver, but we’ve not but put a lot of our self esteem within their palms.. Via internet TutorialsLet’s experience it, a great number of of us really don’t contain the time or income to employ hair dressers, louis vuitton 09 collection makeup artists and stylists on even an occasional foundation.
Christian Louboutin Slingback http://www.cheapclonusa.com
Kathy says:
WalMart or any home improvement store that sells paint.